Tuesday tips and tricks with Tony - Bokeh
Hello fellow stampers and friends~
This is my first week doing a live presentation of stamping tips and tricks. Each week I plan to explore something different. I'm excited and I hope you will enjoy, learn something you may not have known or at least get my take on it.
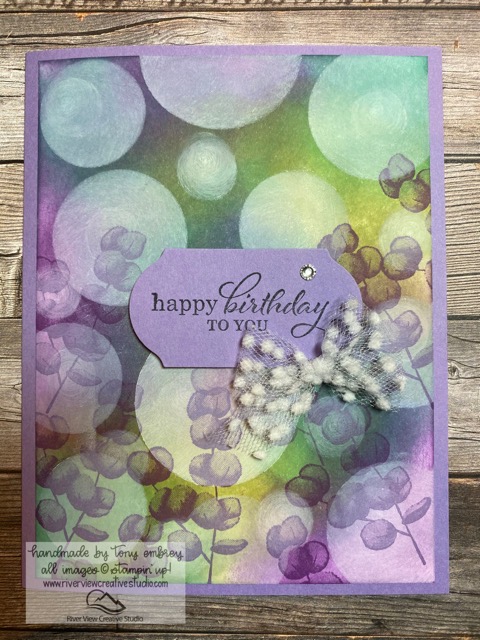
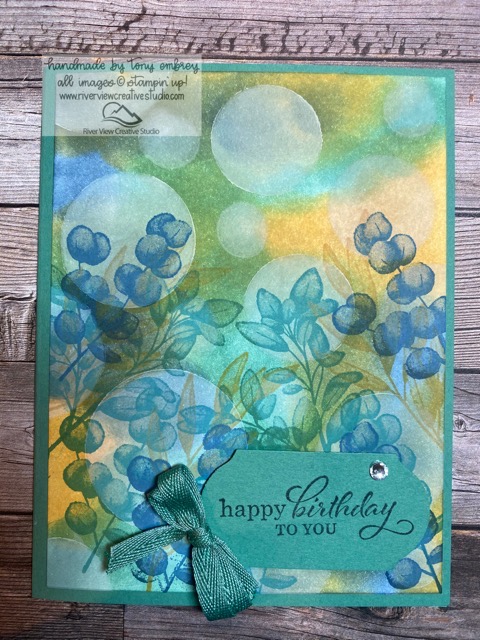
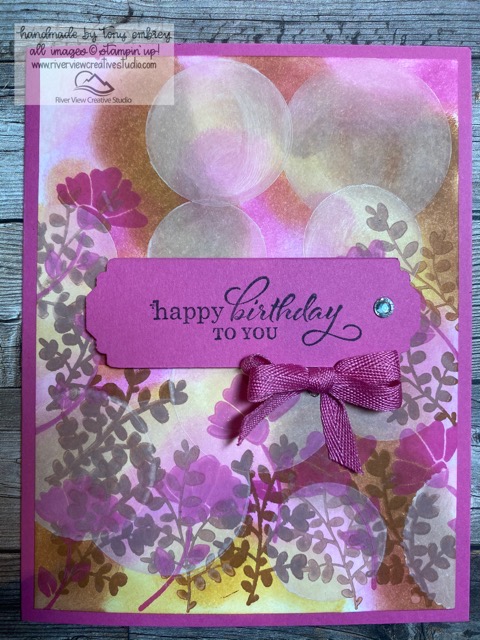
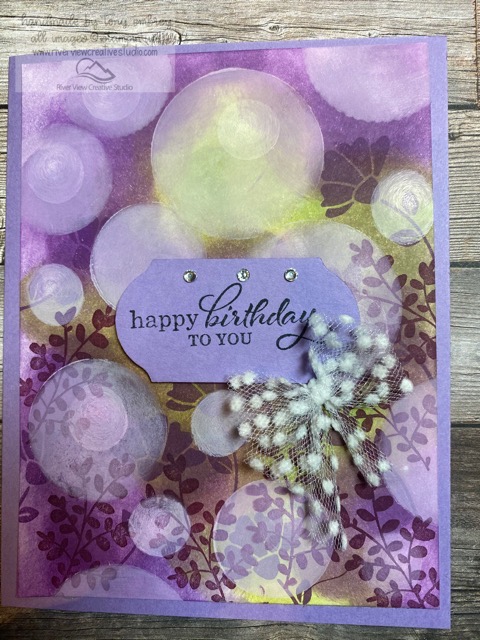
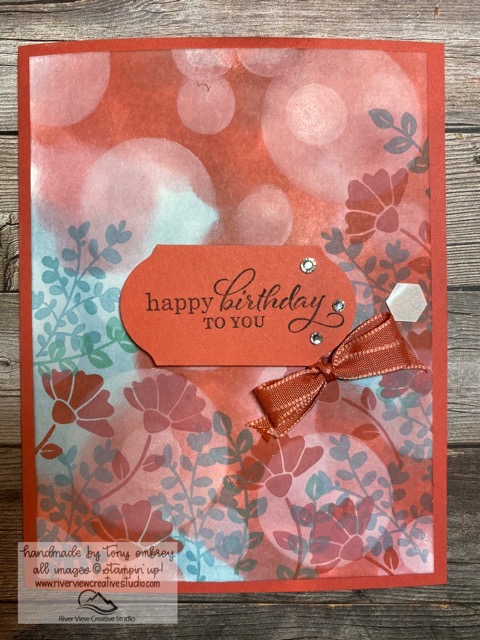
So about a month or so ago, while perusing Pinterest I happened upon a blog post by Rachel Tessman. It was a blog post and tutorial of sorts about Bokeh. Bokeh (pronounced like bouquet) is " the visual quality of the out-of-focus areas of a photographic image."
It can be magical.
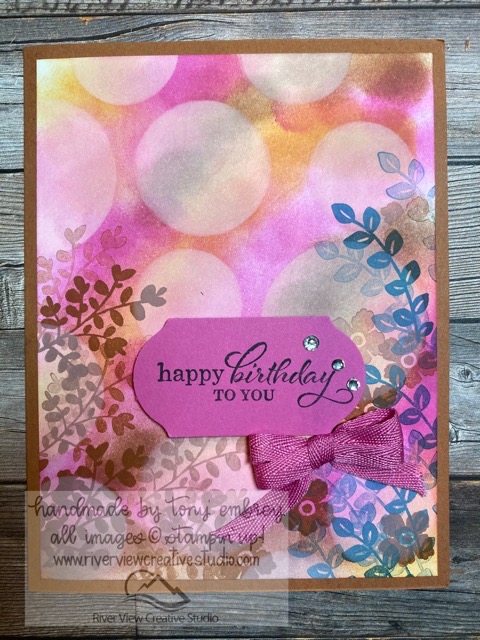
In my live demonstration video I show some completed cards, and do three more on camera. I think it's fun, and no two look alike, at least mine don't. I made a template using the smaller SU Layering Circles cut out of a window sheet.
Supplies:
1. For this project you will need whisper white card stock, 5 1/4" x 4", one for each card front you choose to create.
2. Stamp pads in your choice of colors, I used 3-4, ranging from light to dark shades. You will also need Whisper White stamp pad.
3. Cling stamps: I used "Lovely you" and "Forever Fern" but if you don't have either of those, choose something you like.
4. Sponges either stamping sponges, cut in wedges or sponge daubers, both work
How-to: (refer to the video for demo)
1. Cut circles into the window sheet or vellum, using the layering circle dies or whatever you have in your collection.
2. Apply colors of your choice to the card stock, using a circular motion and random placement. Overlapping colors is good too, just experiment and refer to the video.
3. Once you have achieved the level of color you are happy with, then place the window sheet/vellum over top of the card stock, and lightly apply whisper white ink, stamping on and off to vary the amount of ink. A lighter touch is best at first and then you can always apply more if you feel it's needed to get your desired look.
4. Next using the stamp set of your choice, and a variety of inks in your chosen palate, to stamp images over top of the card. once you are done, allow it to dry for a few hours or use the heat tool to dry it faster.
5. Once dry you can assemble the card to the base and add embellishment of your choice.
Happy Stamping!
God Bless
Tony
<BR Product List


")


This is my first week doing a live presentation of stamping tips and tricks. Each week I plan to explore something different. I'm excited and I hope you will enjoy, learn something you may not have known or at least get my take on it.
So about a month or so ago, while perusing Pinterest I happened upon a blog post by Rachel Tessman. It was a blog post and tutorial of sorts about Bokeh. Bokeh (pronounced like bouquet) is " the visual quality of the out-of-focus areas of a photographic image."
It can be magical.
In my live demonstration video I show some completed cards, and do three more on camera. I think it's fun, and no two look alike, at least mine don't. I made a template using the smaller SU Layering Circles cut out of a window sheet.
Supplies:
1. For this project you will need whisper white card stock, 5 1/4" x 4", one for each card front you choose to create.
2. Stamp pads in your choice of colors, I used 3-4, ranging from light to dark shades. You will also need Whisper White stamp pad.
3. Cling stamps: I used "Lovely you" and "Forever Fern" but if you don't have either of those, choose something you like.
4. Sponges either stamping sponges, cut in wedges or sponge daubers, both work
How-to: (refer to the video for demo)
1. Cut circles into the window sheet or vellum, using the layering circle dies or whatever you have in your collection.
2. Apply colors of your choice to the card stock, using a circular motion and random placement. Overlapping colors is good too, just experiment and refer to the video.
3. Once you have achieved the level of color you are happy with, then place the window sheet/vellum over top of the card stock, and lightly apply whisper white ink, stamping on and off to vary the amount of ink. A lighter touch is best at first and then you can always apply more if you feel it's needed to get your desired look.
4. Next using the stamp set of your choice, and a variety of inks in your chosen palate, to stamp images over top of the card. once you are done, allow it to dry for a few hours or use the heat tool to dry it faster.
5. Once dry you can assemble the card to the base and add embellishment of your choice.
Happy Stamping!
God Bless
Tony
<BR Product List


Add comment
Read More Great Posts In My Blog


Current Host Code
CODEGOESHERE

Upcoming Classes & Events
| Monthly Card Class 12 May 2024 02:00PM - 04:00PM |

Share This on Social Media
Latest Blog Posts
Newsletter Signup
Project Inspirations
.jpg)
.jpg)
.jpg)
.jpg)
.jpg)
.jpg)
.jpg)
.jpg)
.jpg)
.jpg)
.jpg)
.jpg)
.jpg)
.jpg)
.jpg)
.jpg)
.jpg)
.jpg)
.jpg)
.jpg)
.jpg)
.jpg)
.jpg)
.jpg)
.jpg)
.jpg)
.jpg)
.jpg)
.jpg)
.jpg)
.jpg)
.jpg)
.jpg)
.jpg)
.jpg)
.jpg)
.jpg)
.jpg)
.jpg)
.jpg)
.jpg)
.jpg)
.jpg)
.jpg)
.jpg)
.jpg)
.jpg)
.jpg)
.jpg)
.jpg)
.jpg)
.jpg)
.jpg)
.jpg)
.jpg)
.jpg)
.jpg)
.jpg)
.jpg)
.jpg)
.jpg)
.jpg)
.jpg)
.jpg)
.jpg)
.jpg)
.jpg)
.jpg)
.jpg)
.jpg)
.jpg)
.jpg)
.jpg)
.jpg)
.jpg)
.jpg)
.jpg)
.jpg)
.jpg)
.jpg)
.jpg)
.jpg)
.jpg)
.jpg)
.jpg)
.jpg)
.jpg)
.jpg)
.jpg)
.jpg)
.jpg)
.jpg)
.jpg)
.jpg)
.jpg)
.jpg)
.jpg)
.jpg)
.jpg)
.jpg)
.jpg)
.jpg)
.jpg)
.jpg)
.jpg)
.jpg)
.jpg)
.jpg)
.jpg)
.jpg)
.jpg)
.jpg)
.jpg)
.jpg)
.jpg)
.jpg)
.jpg)
.jpg)
.jpg)
.jpg)
.jpg)
.jpg)
.jpg)
.jpg)
.jpg)
.jpg)
.jpg)
.jpg)
.jpg)
.jpg)
.jpg)
.jpg)
.jpg)
.jpg)
.jpg)
.jpg)
.jpg)
.jpg)
.jpg)
.jpg)
.jpg)
.jpg)
.jpg)
.jpg)
.jpg)
.jpg)
.jpg)
.jpg)
.jpg)
.jpg)
.jpg)
.jpg)
.jpg)
.jpg)
.jpg)
.jpg)
.jpg)
.jpg)
.jpg)
.jpg)
.jpg)
.jpg)
.jpg)
.jpg)
.jpg)
.jpg)
.jpg)
.jpg)
.jpg)
.jpg)
.jpg)
.jpg)
.jpg)
.jpg)
.jpg)
.jpg)
.jpg)
.jpg)
.jpg)
.jpg)
.jpg)
.jpg)
.jpg)
.jpg)
.jpg)
.jpg)
.jpg)
.jpg)
.jpg)
.jpg)
.jpg)
.jpg)
.jpg)
.jpg)
.jpg)
.jpg)
.jpg)
.jpg)
.jpg)
.jpg)
.jpg)
.jpg)
.jpg)
.jpg)
.jpg)
.jpg)
.jpg)
Paper Pumpkin
Paper Pumpkin is the perfect monthly crafting kit for Everyone! No special skills or tools required. Each month a fully complete project kit arrives in a delightful box filled with stamps, ink, and paper—everything cut and ready to go so you can skip right to the fun.
TELL ME MORE SIGN ME UP!
TELL ME MORE SIGN ME UP!