Welcome to my first blog post from River View Creative Studio!
Welcome to my first blog post as a Stampin up! demonst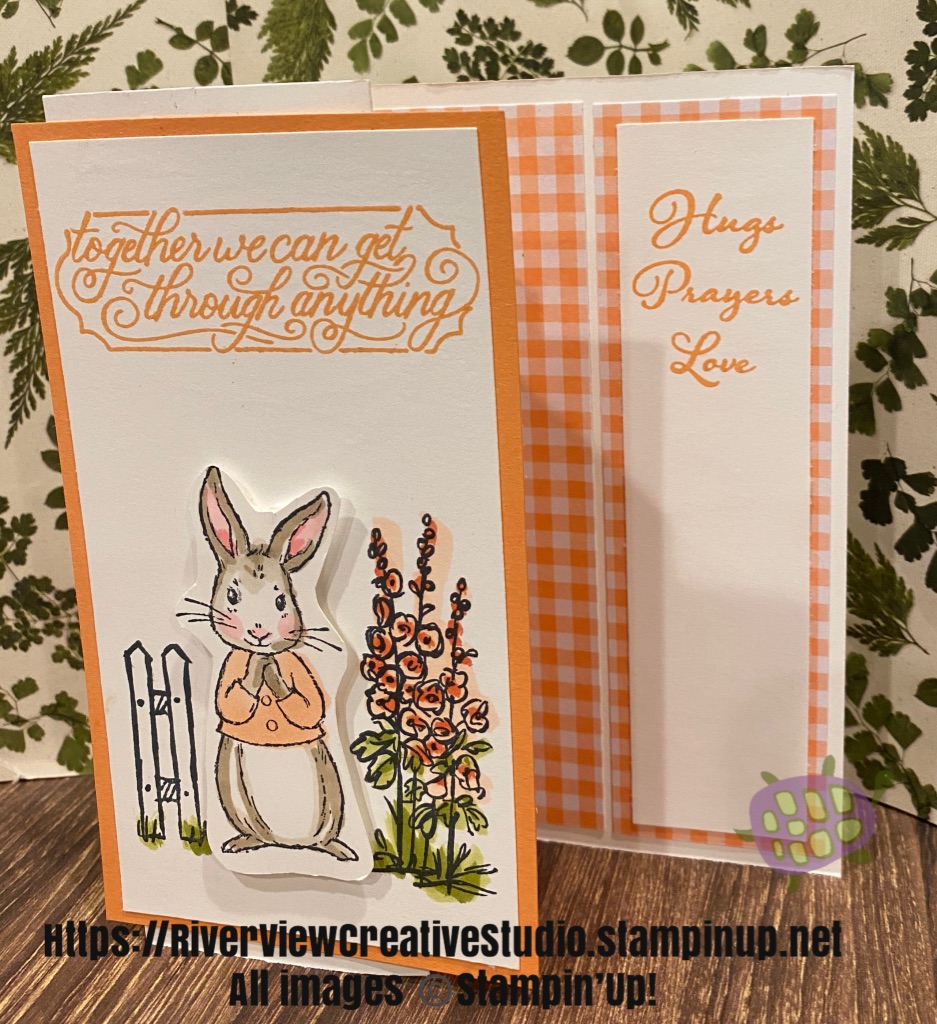 rator. In my blog I will be sharing things I have learned, techniques and tutorial projects. I hope that you will subscribe to my webpage and together we can explore all that Stampin up! has to offer.
rator. In my blog I will be sharing things I have learned, techniques and tutorial projects. I hope that you will subscribe to my webpage and together we can explore all that Stampin up! has to offer.For my first tutorial I am sharing a card that I recently created to send out to friends and family to let them know that they are in my thoughts and prayers and to let them know we will get through this together. We will look forward to better days ahead. It is a beautiful card and uses stamps from four different sets. Of course if you do not currently have all of the sets you can choose stamps from your collection that speak to you personally or you may place an order with me for any sets you are missing.
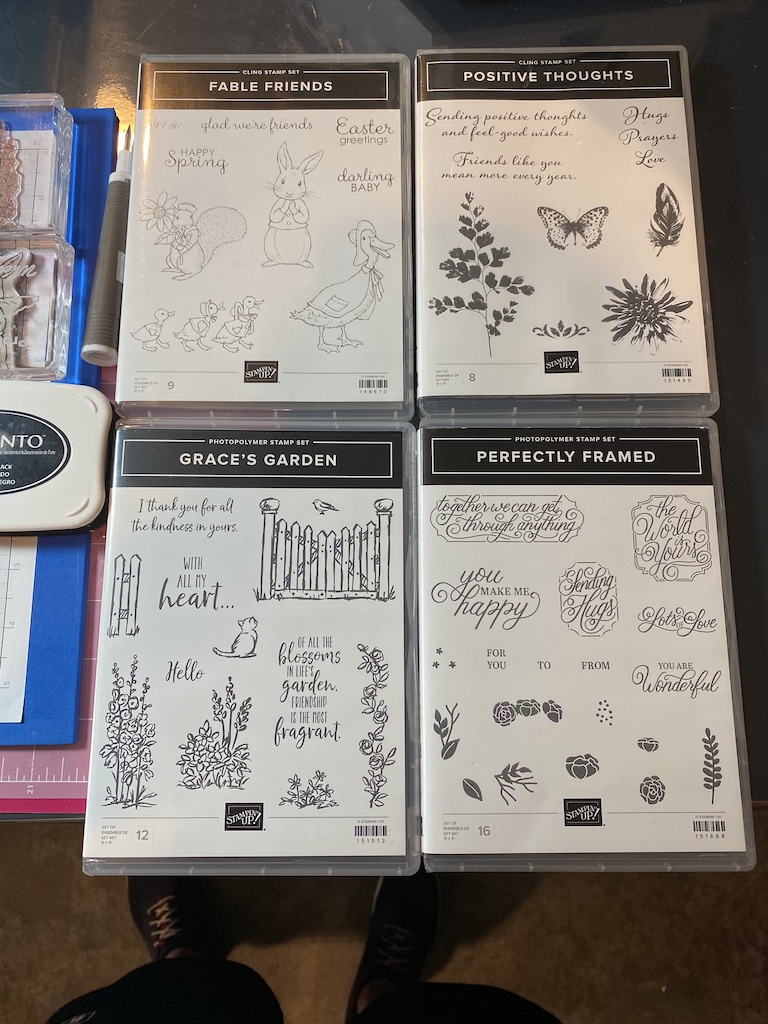
The four sets are as follows: Perfectly Framed, Positive Thoughts, Fable Friends and Grace's Garden.
 For this project, you will need one sheet of Whisper White, 8 1/2" by 11".
For the card base, cut a piece 8 1/2" wide x 5 1/2" tall. score at 2" and 4 1/4". We are using a "Z" fold for this project. Using a bone folder, fold and burnish the card base in half and fold back the 2" end. Refer to the photo below if needed.
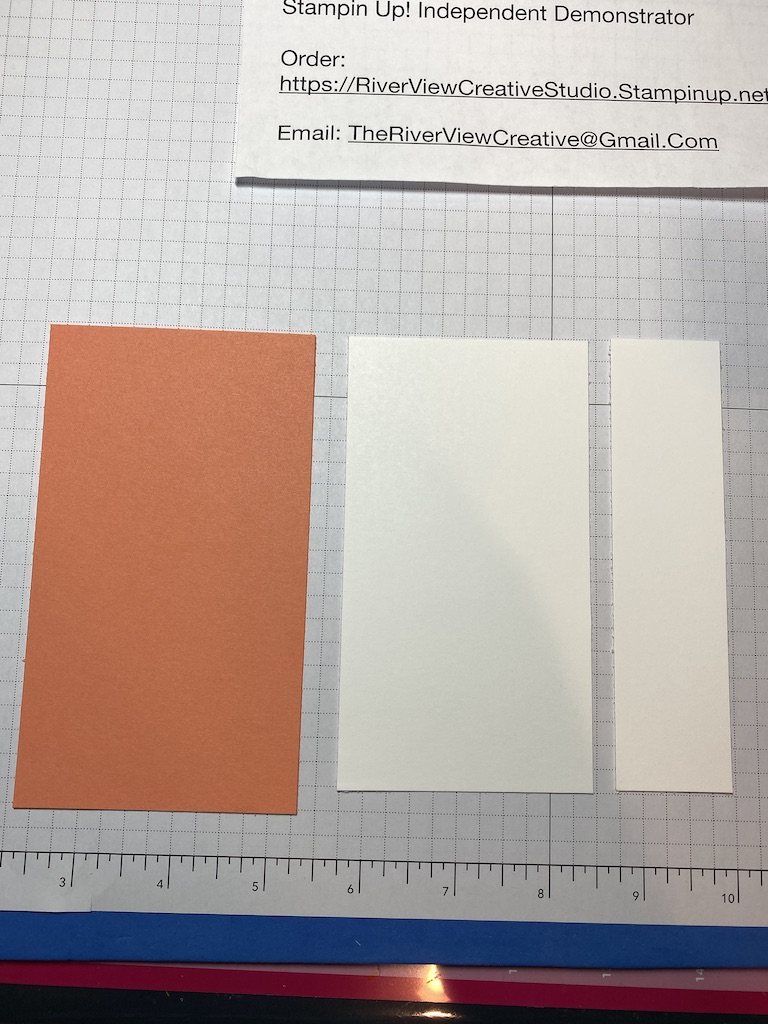
From the remainder of the whisper white cut two pieces, (1) 2 3/4" wide X 5" tall; (1) 1 1/4" wide X 5 " tall.
Using a card stock of your color choice cut (1) 3" wide X 5 1/4" tall piece.
note: colors used in photographs are Grapefruit Grove and Bermuda Bay
From the Designer Series Paper (dsp 6" x 6") of your choice cut one side to 5 1/4".
Turning the paper, cut as follows: (1) 2" wide x 5 1/4" tall piece; (1) 2 1/2" wide x 5 1/4" tall piece. the remaining piece should be 1 1/2" wide x 5 1/4" tall. Using the photo as a guide and stamp (together we can...) from Perfectly Framed set, and the ink color of your choice, stamp the sentiment near the top of the 2 3/4" wide x 5" tall piece of whisper white card stock.
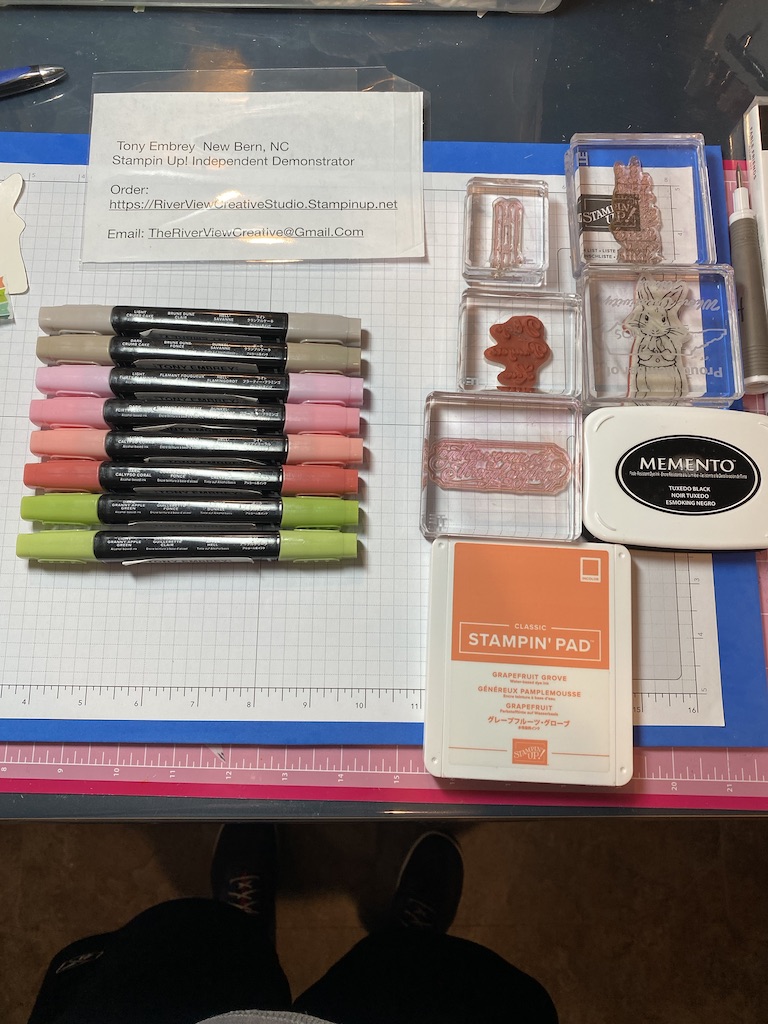
On the same piece, using the stamps of the small fence piece and the tall flower stalk, and black momentum ink,referring to the photo, stamp the fence and the flower stalk. Color flower stalk, leaves and grass using stamp n' blends of your choice.
Using a scrap piece of Whisper White card stock, and the bunny stamp from Fable Friends, stamp the bunny using black momentum ink. Color using the stamp n' blends of your choice. Fussy cut out the bunny, using the rubber stamp as an outline. Refer to the photo as needed. Adhere dimensionals to the back and place the bunny between the fence and flower stalk.
 For the 1 1/4" wide by 5" tall piece of whisper white, and the (hugs prayers and love) stamp from Positive Thoughts, and the color ink of your choice, stamp the sentiment near the top of the paper. Refer to the photograph as needed.
Adhere the white cardstock to the front of the 1 1/2" wide x 5 1/4" tall DSP and adhere to the far right side of the card. Refer to the photo as needed.
Adhere the Whisper white (piece with bunny, fence and flowers) to the front of the 3" wide x 5 1/4" piece of colored card stock and using the adhesive of your choice and the photo as a guide adhere to the front of the white (2" flap) of the card base.
Adhere the remain two pieces of DSP, using the card photo for placement.
I hope you have enjoyed making this card and I look forward to sharing many more techniques and projects. I hope you will subscribe to my blog and share it with others. If you have any questions, I am happy to help.
God Bless,
Tony
Add comment
Read More Great Posts In My Blog


Current Host Code
CODEGOESHERE
Upcoming Classes & Events
| Monthly Card Class 12 May 2024 02:00PM - 04:00PM |

Share This on Social Media
Latest Blog Posts
Newsletter Signup
Project Inspirations
.jpg)
.jpg)
.jpg)
.jpg)
.jpg)
.jpg)
.jpg)
.jpg)
.jpg)
.jpg)
.jpg)
.jpg)
.jpg)
.jpg)
.jpg)
.jpg)
.jpg)
.jpg)
.jpg)
.jpg)
.jpg)
.jpg)
.jpg)
.jpg)
.jpg)
.jpg)
.jpg)
.jpg)
.jpg)
.jpg)
.jpg)
.jpg)
.jpg)
.jpg)
.jpg)
.jpg)
.jpg)
.jpg)
.jpg)
.jpg)
.jpg)
.jpg)
.jpg)
.jpg)
.jpg)
.jpg)
.jpg)
.jpg)
.jpg)
.jpg)
.jpg)
.jpg)
.jpg)
.jpg)
.jpg)
.jpg)
.jpg)
.jpg)
.jpg)
.jpg)
.jpg)
.jpg)
.jpg)
.jpg)
.jpg)
.jpg)
.jpg)
.jpg)
.jpg)
.jpg)
.jpg)
.jpg)
.jpg)
.jpg)
.jpg)
.jpg)
.jpg)
.jpg)
.jpg)
.jpg)
.jpg)
.jpg)
.jpg)
.jpg)
.jpg)
.jpg)
.jpg)
.jpg)
.jpg)
.jpg)
.jpg)
.jpg)
.jpg)
.jpg)
.jpg)
.jpg)
.jpg)
.jpg)
.jpg)
.jpg)
.jpg)
.jpg)
.jpg)
.jpg)
.jpg)
.jpg)
.jpg)
.jpg)
.jpg)
.jpg)
.jpg)
.jpg)
.jpg)
.jpg)
.jpg)
.jpg)
.jpg)
.jpg)
.jpg)
.jpg)
.jpg)
.jpg)
.jpg)
.jpg)
.jpg)
.jpg)
.jpg)
.jpg)
.jpg)
.jpg)
.jpg)
.jpg)
.jpg)
.jpg)
.jpg)
.jpg)
.jpg)
.jpg)
.jpg)
.jpg)
.jpg)
.jpg)
.jpg)
.jpg)
.jpg)
.jpg)
.jpg)
.jpg)
.jpg)
.jpg)
.jpg)
.jpg)
.jpg)
.jpg)
.jpg)
.jpg)
.jpg)
.jpg)
.jpg)
.jpg)
.jpg)
.jpg)
.jpg)
.jpg)
.jpg)
.jpg)
.jpg)
.jpg)
.jpg)
.jpg)
.jpg)
.jpg)
.jpg)
.jpg)
.jpg)
.jpg)
.jpg)
.jpg)
.jpg)
.jpg)
.jpg)
.jpg)
.jpg)
.jpg)
.jpg)
.jpg)
.jpg)
.jpg)
.jpg)
.jpg)
.jpg)
.jpg)
.jpg)
.jpg)
.jpg)
.jpg)
.jpg)
.jpg)
.jpg)
.jpg)
.jpg)
.jpg)
.jpg)
.jpg)
.jpg)
.jpg)
.jpg)
Paper Pumpkin
Paper Pumpkin is the perfect monthly crafting kit for Everyone! No special skills or tools required. Each month a fully complete project kit arrives in a delightful box filled with stamps, ink, and paper—everything cut and ready to go so you can skip right to the fun.
TELL ME MORE SIGN ME UP!
TELL ME MORE SIGN ME UP!