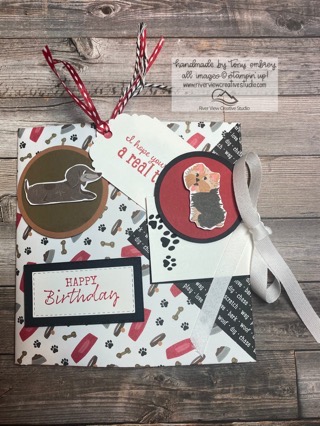
One of my favorite projects, Let's make an Affirmation Card/fold with 6 pockets to hold affirming messages and treats!
Hello Fellow Stampers and Friends~
I was originally inspired to make this project by a similar design I saw on Pinterest about a year ago. Personally, I try to send out positive, affirming messages , uplifting and encouraging to everyone in my circle and beyond. I believe that we never know who may need to see a smile, hear a kind word of a hug, and rather than assume everyone is 'good', I follow my heart and go with whatever feels right to me. SO, it is in this vein, that I decided it was time to share this project in my live Saturday Night, stamping with Tony, on my Facebook page, River View Creative Studio.
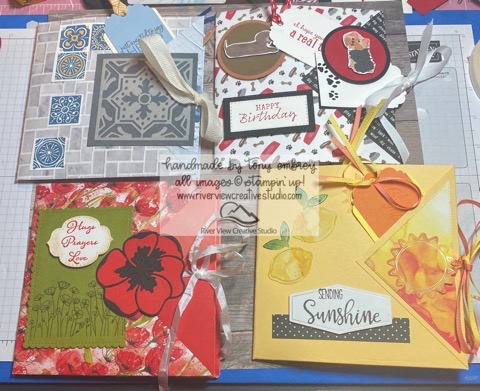
I created two different folders/cards ahead of time, and a third one during the tutorial. You may enjoy watching the video which is included in this blog post, and I have also included some photos and directions for how to make one for yourself. I hope that I have inspired you to share one with someone in your life!
Happy Stamping and God Bless!
Tony
Supplies:
one 12" x 12" sheet of Designer Series Paper. note: you can use regular thickness card stock but folds are a little more challenging.
Coordinating colors of cardstock and inks, ribbon
tag punches, rectangle and triangle dies or whatever you like
Assembly:
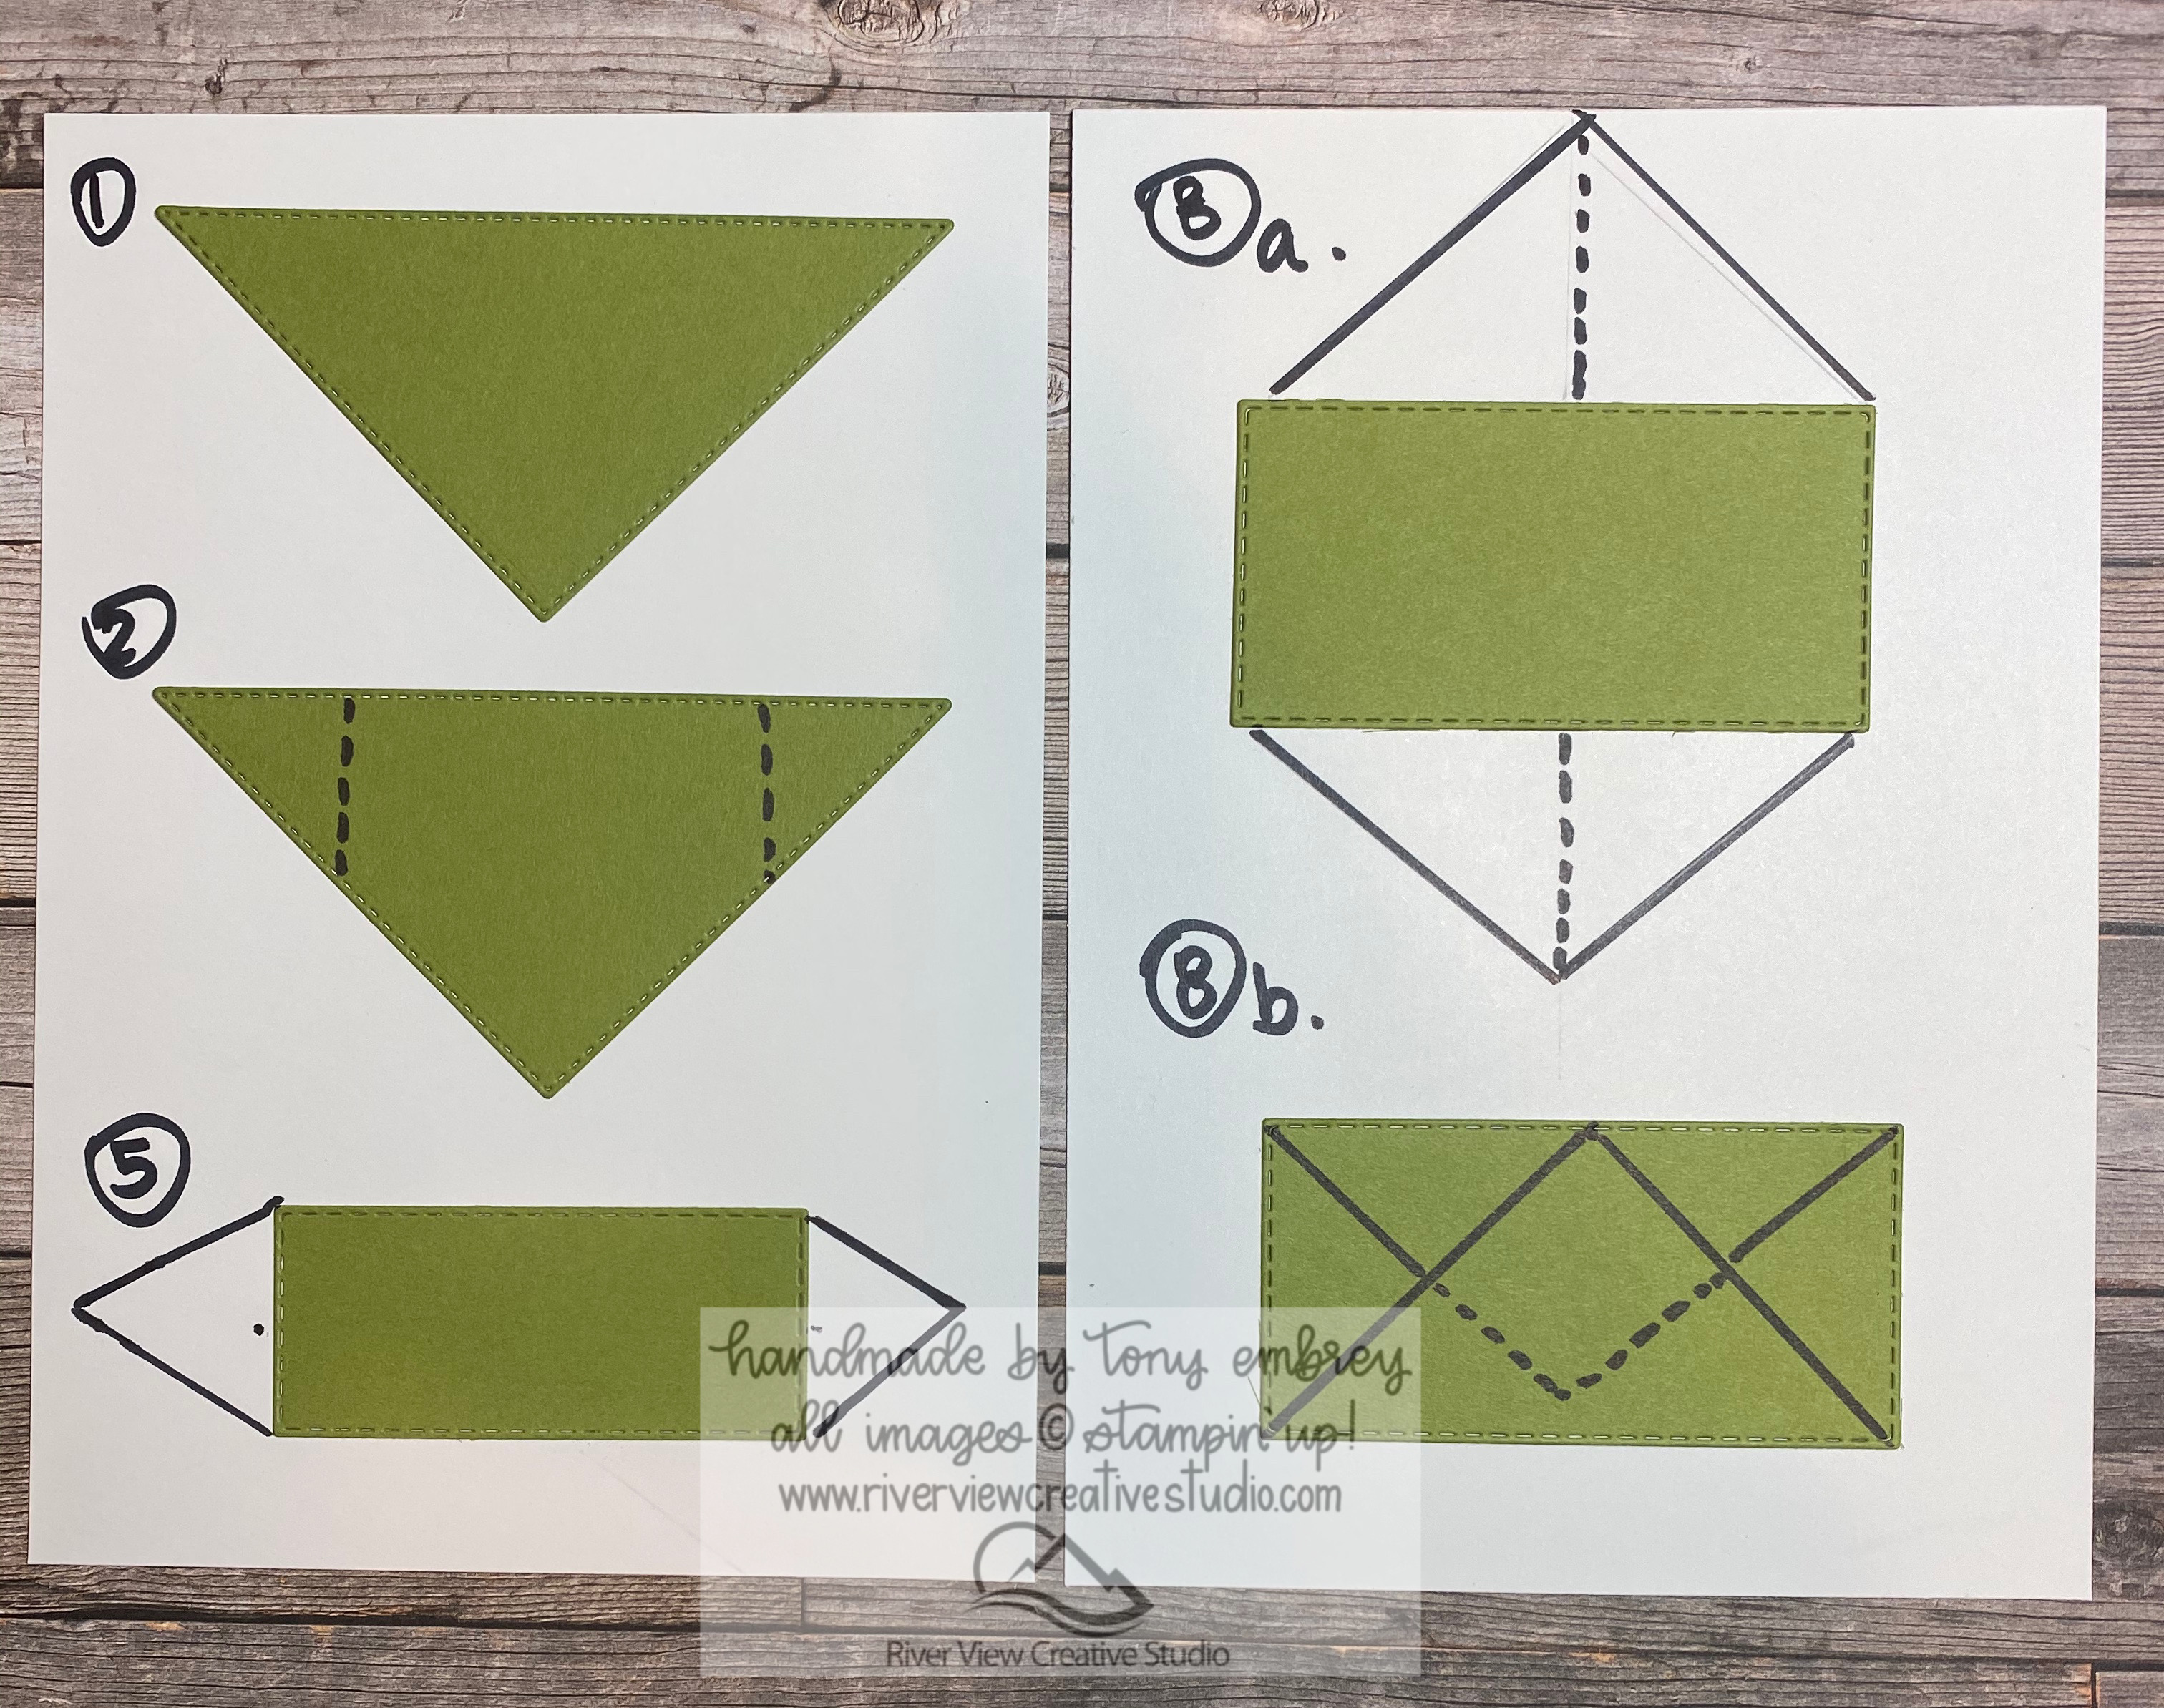
Refer to the video and photos as needed to create the project.
1. Fold the paper diagonally corner to corner.
2. Measure 5 5/8" from the left and the right corners and score (dotted line)
3. Open up and refold as show in diagram 5. Score where the triangle meets the rectangle on each side
and fold it to the opposite side, backside. This will become a pocket.
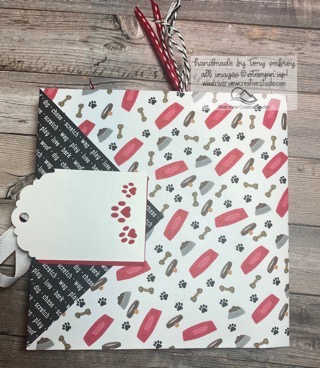
4. Flip over and crease in the middle, this forms the folder and you will be able to count 6 pockets..
5. Open up as shown in figure 8a. apply adhesive on dotted lines (refer to the video for visual)
6. Additional adhesive should be applied to the dotted line areas in Figure 8b. Refer to video for reference if not clear in diagram.
7. Apply adhesive to the bottom section of the triangle for the pockets on the outside of the folder.
8. Add embellishments and sentiments.

Product List


 Crinkled Seam Binding Ribbon")
 Circle Punch")
 Circle Punch")


Add comment
Read More Great Posts In My Blog


Current Host Code
CODEGOESHERE
Upcoming Classes & Events
| Monthly Card Class 12 May 2024 02:00PM - 04:00PM |
Share This on Social Media
Latest Blog Posts
Newsletter Signup
Project Inspirations
.jpg)
.jpg)
.jpg)
.jpg)
.jpg)
.jpg)
.jpg)
.jpg)
.jpg)
.jpg)
.jpg)
.jpg)
.jpg)
.jpg)
.jpg)
.jpg)
.jpg)
.jpg)
.jpg)
.jpg)
.jpg)
.jpg)
.jpg)
.jpg)
.jpg)
.jpg)
.jpg)
.jpg)
.jpg)
.jpg)
.jpg)
.jpg)
.jpg)
.jpg)
.jpg)
.jpg)
.jpg)
.jpg)
.jpg)
.jpg)
.jpg)
.jpg)
.jpg)
.jpg)
.jpg)
.jpg)
.jpg)
.jpg)
.jpg)
.jpg)
.jpg)
.jpg)
.jpg)
.jpg)
.jpg)
.jpg)
.jpg)
.jpg)
.jpg)
.jpg)
.jpg)
.jpg)
.jpg)
.jpg)
.jpg)
.jpg)
.jpg)
.jpg)
.jpg)
.jpg)
.jpg)
.jpg)
.jpg)
.jpg)
.jpg)
.jpg)
.jpg)
.jpg)
.jpg)
.jpg)
.jpg)
.jpg)
.jpg)
.jpg)
.jpg)
.jpg)
.jpg)
.jpg)
.jpg)
.jpg)
.jpg)
.jpg)
.jpg)
.jpg)
.jpg)
.jpg)
.jpg)
.jpg)
.jpg)
.jpg)
.jpg)
.jpg)
.jpg)
.jpg)
.jpg)
.jpg)
.jpg)
.jpg)
.jpg)
.jpg)
.jpg)
.jpg)
.jpg)
.jpg)
.jpg)
.jpg)
.jpg)
.jpg)
.jpg)
.jpg)
.jpg)
.jpg)
.jpg)
.jpg)
.jpg)
.jpg)
.jpg)
.jpg)
.jpg)
.jpg)
.jpg)
.jpg)
.jpg)
.jpg)
.jpg)
.jpg)
.jpg)
.jpg)
.jpg)
.jpg)
.jpg)
.jpg)
.jpg)
.jpg)
.jpg)
.jpg)
.jpg)
.jpg)
.jpg)
.jpg)
.jpg)
.jpg)
.jpg)
.jpg)
.jpg)
.jpg)
.jpg)
.jpg)
.jpg)
.jpg)
.jpg)
.jpg)
.jpg)
.jpg)
.jpg)
.jpg)
.jpg)
.jpg)
.jpg)
.jpg)
.jpg)
.jpg)
.jpg)
.jpg)
.jpg)
.jpg)
.jpg)
.jpg)
.jpg)
.jpg)
.jpg)
.jpg)
.jpg)
.jpg)
.jpg)
.jpg)
.jpg)
.jpg)
.jpg)
.jpg)
.jpg)
.jpg)
.jpg)
.jpg)
.jpg)
.jpg)
.jpg)
.jpg)
.jpg)
.jpg)
.jpg)
.jpg)
.jpg)
.jpg)
.jpg)
.jpg)
.jpg)
Paper Pumpkin
Paper Pumpkin is the perfect monthly crafting kit for Everyone! No special skills or tools required. Each month a fully complete project kit arrives in a delightful box filled with stamps, ink, and paper—everything cut and ready to go so you can skip right to the fun.
TELL ME MORE SIGN ME UP!
TELL ME MORE SIGN ME UP!